Restoring water damaged photos

Restoring water damaged photos is an indispensable helper for anyone who has troubles with photo albums. Do you have damaged photos, which you are going to throw out and forget because of the quality? Don't do it as it becomes possible to save them with the help of modern technologies. Photos catch all our pleasant memories about different important events or people in our life, that's why we can't reject them so quickly. Today we can apply to restoring water damaged photos as easily as we do shopping online. In this article we'll offer insights into the ways how to fix water damaged book pages. See different photo restoration samples. Finally, you will get know how to clean pictures in Photoshop or by yourself. Read it and double up to try out with despatch all the things that we'll highlight here!

Restoring water damaged photos in some steps
For any photographer his albums of photos are a priceless treasure or someone keeps a collection of family photos as a heirloom. The sudden accidents happened with your favourite picture put you out of humor. There is no reason to run scared. Take the following steps in the water damaged paper recovery:

1. Take out wet photos from an album's binding so that you will able to dry out each picture separately. Also you can keep an album open. But it takes more time than you hang paper photos on a string. It allows you to keep the paper from curling. Don't place them on any surface as the water can damage not only your photos but also your furniture. The most harmless way is to allocate a picture face up on a towel. Wait for a while and then displace it between the leaves of any book for a day when it starts going dry. Don’t overdry.

2. Use an extra chemical that saves your photos from the considerable harm of water. So, if your images get stuck together, the only thing you need to do is to soak them in tepid water. Therefore, you'll able to split off them easily. However, another liquid is not so easily cleaned off from the pictures. Try to get rid of it too by soaking and drying.
3. Apply to professionals who are more aware how to save water damaged photos. The service of water damaged paper recovery is based on the total removal of water spots. Read more about photo restoration services. To get amazed also read Photoshopped historical photos which make your mouth open.
There are the other ways to prevent your pictures from flood or children's awkwardness:
1. Cover up each picture of your album. You'll not notice any signs of the frequent usage of your perfect album. Furthermore, today there are a lot of creative ideas for creating albums. And a cover of your album must look brilliantly like the covers of famous musicians or singers.
2. Back up your pictures on a device that is convenient for you. It can be CD disks, memory sticks or a cloud environment. Due to digital development it is always possible to browse them whenever and wherever you are.
Not always water is an enemy for you as for photographer. You can use it as a creative way to make perfect photos, for example, under water. Learn underwater photography tips and utilize them in your artworks.

How do I separate photos that are stuck together?
You've come at a box with the old photos and faced the challenge of their gluing together. Certainly, you are trying to separate the photos but your attempts just lead to the worst results. Eventually, you get torn images.

In order to detach your photos without damaging them, you need to soak them in warm water (20-30°C, 68-86°F) for an hour. A conventional type of a photograph is protected with chemicals. After that you will be able to separate easily. Don’t forget to dry them on a line or a towel.
How do you clean a photo?
Without any doubt, time puts imprint on everything in the world. As a human, photos also tend to get old and their colors fade over time. Dust and grime light upon them and the quality of print photos is negatively affected. Consequently, people attempt to clean their favorite pictures. The ideal thing is to make a backup or a negative of a photo before you start the process of cleaning because as a rule all unpleasant situations usually happen accidentally. Take into consideration this fact and treat this process carefully. And be ready in advance.
In cases if you have no understanding how to clean your photos properly, you can apply to different editing services either online or in a company. For that you need to have a scanned image. Pay attention to that if your photo is full of dust, especially if it has a negative effect on facial details. It is quite more difficult to fix a digital image that an original one.
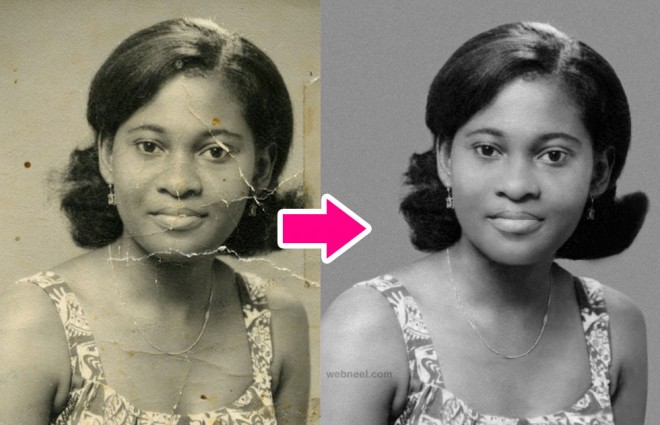
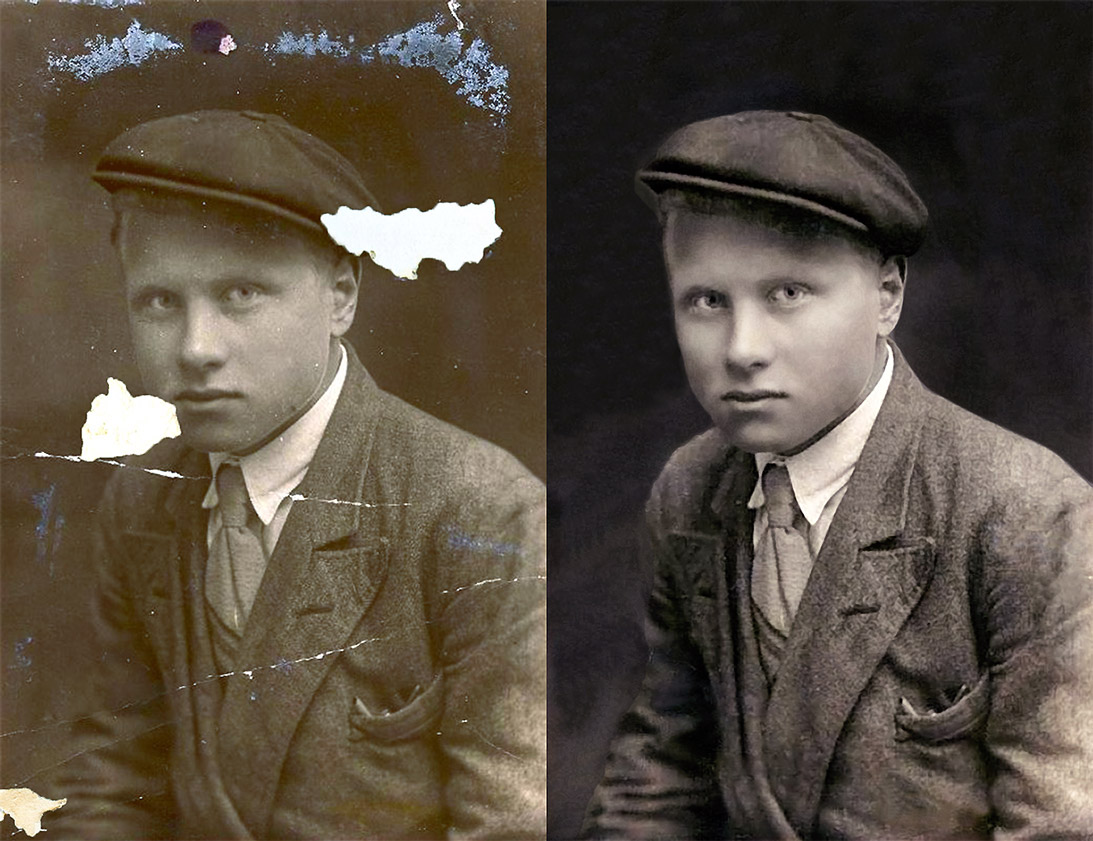
Sometimes, too old photos come into your hands that hold true value for you. But they are so fragile so that you can't keep them in your hands without mentioning the cleaning process. It would be better to bring such samples to professional editors who has a high level of ability to cope with old photos to make them as perfect as they haven't been ever.

Well, if you are determined to do it without any help, take into account the following tips how to clean pictures in Photoshop. The high-usage tools for photo paper restoration in Adobe Photoshop are Clone Stamp Tool, Healing Brush Tool and Patch Tool. In spite of the existence of various ways to recover the old photos, we concentrate on the most widespread one.
1. The first stage is the most important one as you need to scan a photo. It must be cleaned from dust and fingerprints by a soft cleaning cloth and a brush. Set the highest graphics resolution 300 - 600 dpi. Opt chromatic mode in a scanner (RGB) that gives the opportunity to save more details for photo restoration. It is recommended to scan a picture several times. It allows you to regulate the opacity of layers in Adobe Photoshop deleting abrasion marks.
2. Assess the degree of the damage which you’re going to fix. Then make an image framing according to the necessary composition. Scuffed edges can be cut if they don’t spoil the composition.
3. Work on the color correction in the menu Levels either in the auto mode or manually. Color Intensity allows you to set an appropriate degree of saturation. Neutralise all the middle tones. Click on Lab Color to work with an image’s relief. Scratches can be deleted with the help of Clone Stamp Tool or Healing Brush Tool. These tools also can be used for the facial correction.

4. Restoring of the lacking areas in a photo is possible to do with the help of Patch Tool. It means to use a patch to cover the spoiled areas. If you have to fix the symmetric areas, for example, a face, apply to the function Flip Horizontal from Transform.
5. The option Shadow/Highlight is applicable to fix blind areas. Use Unsharp Mask to set an acutance in the photos.
If you set a high value on a picture and you want to try out your skills in the cleaning, you're welcome. Just remember the necessary things and the procedure of the cleaning process. Start with the things that you need:
• An emulsion cleaner for photographs
• A soft stroke of the paintbrush
• A cleaning cloth
• An air duster
• Cotton gloves
• A towel
The procedure of cleaning involves the following points:
1) Place a towel on a surface where you're going to work
2) Put cotton gloves on and lay a photograph on a towel
3) Brush off dust with a brush or blow away with an air duster
4) Use an emulsion cleaner to remove grime. Carefully read the instructions on its label to achieve the best results of your work
5) Use a dry place for storing photos
Besides, you should remember the tips while using emulsion cleaners for photographs. Firstly, start working on a picture of little value or start with small areas to escape the damage of the whole photo.
In the modern world it seems almost everything becomes possible to recreate and old photos is no exception. Now you are able to look at old pictures from a new side due to the fast progress in digital photo industry. And we are proud to be a part of it. Our specialists are ready to help you with photo enhancement. Sometimes not only time damages your memories caught on the paper, but also water or fire cause the bad view. Our team takes on the task of photo recovery regardless it is challenging. Look at the photo restoration prices. Perhaps you are those who have a dream to start your own e business, but you don't know how to make a move. Dealing with angry customers – photographers must know some tricks will be useful for you.
Tell you friends about this article!

Would you rate the article?
The article has a rating of:
|
| Via Facebook: |
| Via Disqus: |