How to repair photographs in 10 steps

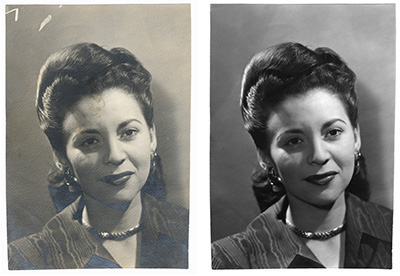
How to repair photographs efficiently and effectively is the question that bothers lots of contemporary photographers and photo manipulators. The main problem is that all paper pictures are completely defenseless while facing time that is always ruthless. To preserve valuable memories it is inevitable to use photo restoration services that offer various restoring techniques and strategies. However, such a vast variety of Photoshop old photograph repairing causes additional problems, as now it is hard to determine one common way of editing that will be the most successful and rational for every vintage photo. Sometimes hesitating photo manipulators may get at a loss facing all presented services for effective restoring old photos in Photoshop. For solving this trouble, we would like to present 10 practical steps that will be useful during every successful restoring procedure. So, let`s get started and we will decompose repairing old photos in Photoshop into the most used components for you.
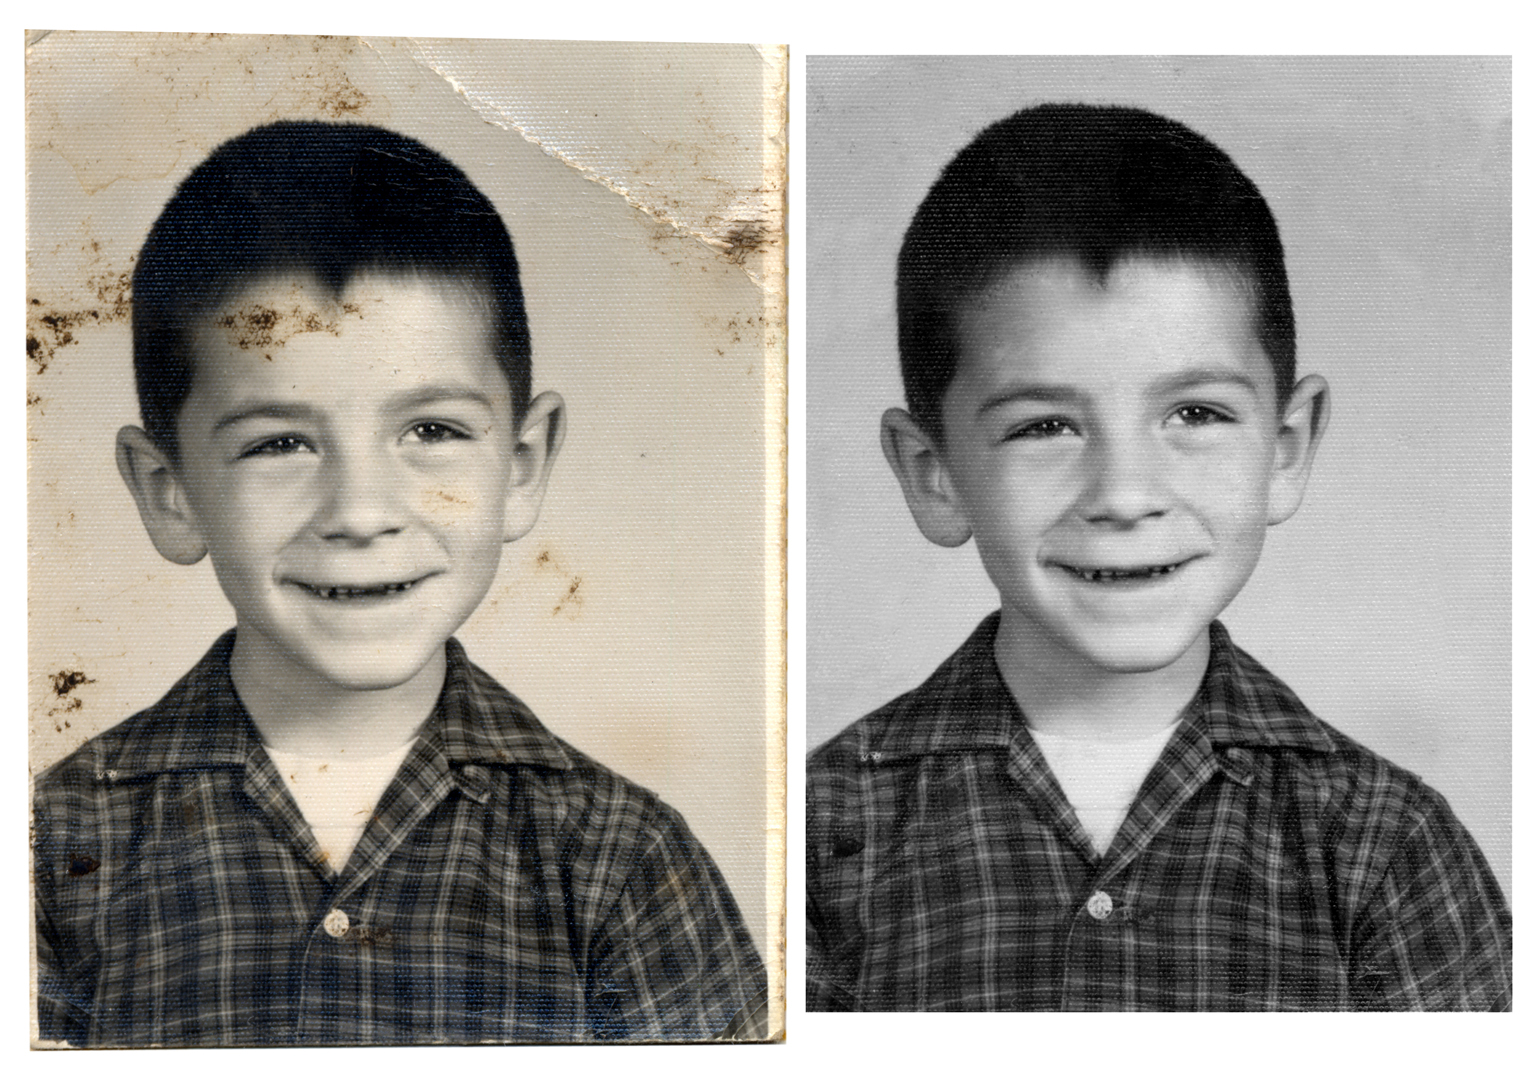
1. Repair and retouch an old photograph in Photoshop
Experts in Photoshop old photograph restoring know that theory is undisputedly useful, but when it comes to real vintage picture saving, examples and practice are the most important. We cannot practice instead of you, but in terms of examples much effort will be devoted to supply you with only the most informative of them.
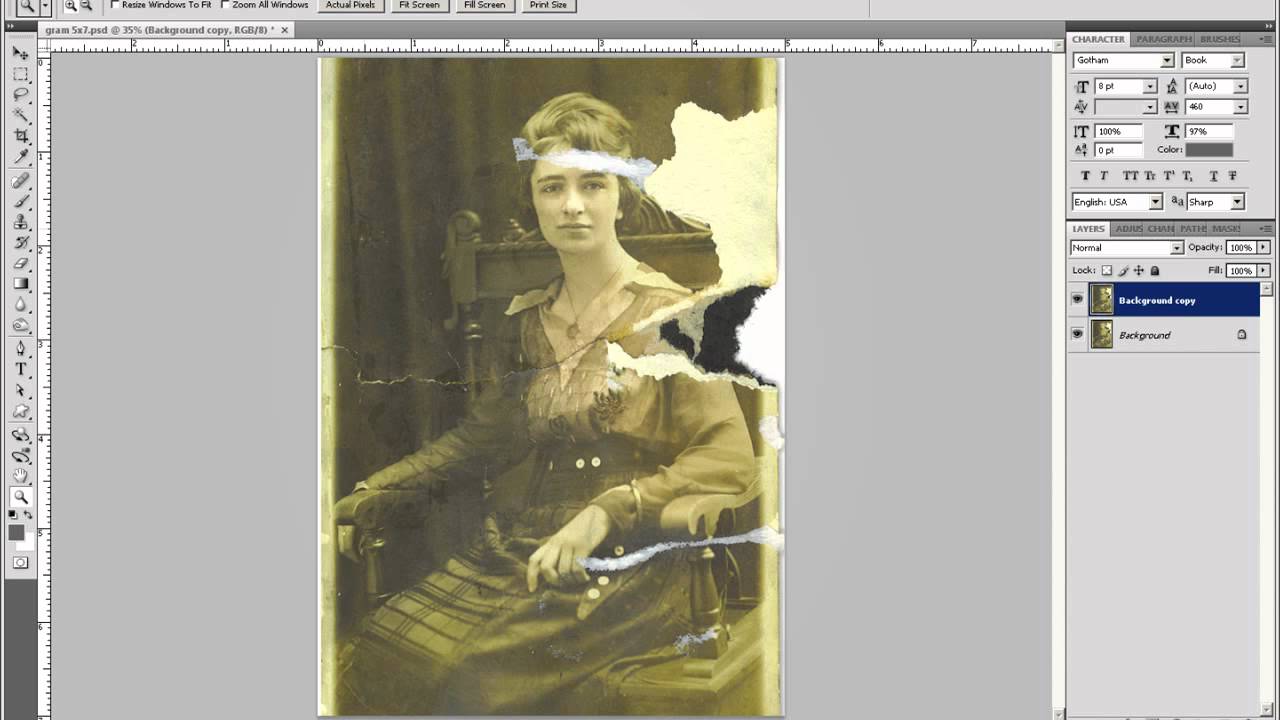
You should know that every chosen step of repairing old photos in Photoshop describes one particular notion needed for professional and, what is the most important, efficient Photoshop old photograph restoring. Those, who have already dealt with vintage photos, realize that knowing only the basic tools as Healing brush or Clone Stamp tool is surely effective, but that is not enough for becoming a master in this limited branch of photo editing.
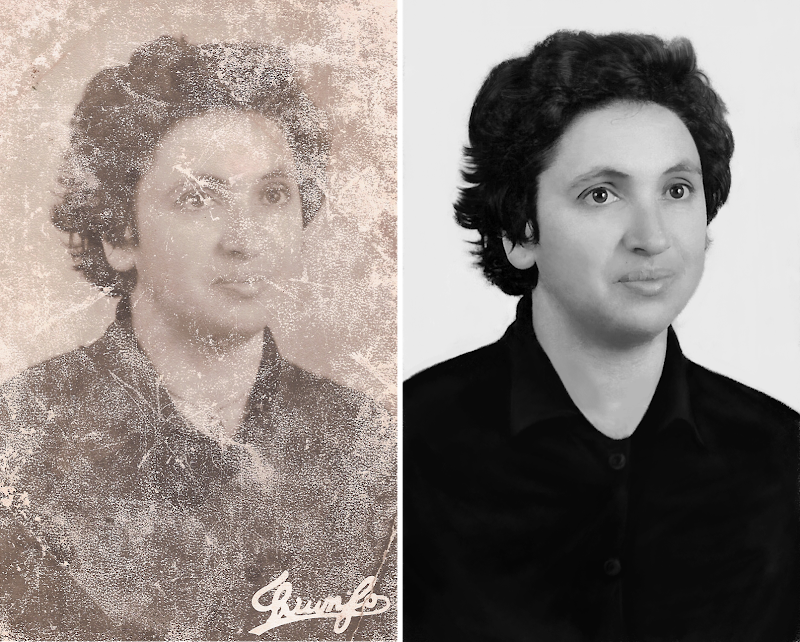
Generally, techniques for restoring old photos in Photoshop are divided into those devoted to picture repairing and those applied for common retouching in order to make saved photography look modern again. Still, in most cases while restoring photo manipulators tend to save the sepia color, because that is the distinguished feature of vintage photography of the 20th century.
If you have a wish, you may practice repairing old photos in Photoshop together with us perfecting your skills at every step. For this, you should choose an old damaged picture, it is better to find those with scratches, open it in Photoshop and repeat everything you read there. Besides, to know more about the possible ways of preserving old photo memories read Memory remains or how to preserve old photographs.
2. Adjust curves
Adjustment panel contains a special button called Curves button. In case you click on Auto, you will see that the tonality of a picture will be shown as a straight line. But if you start adjusting it manually, the line will turn into curve.
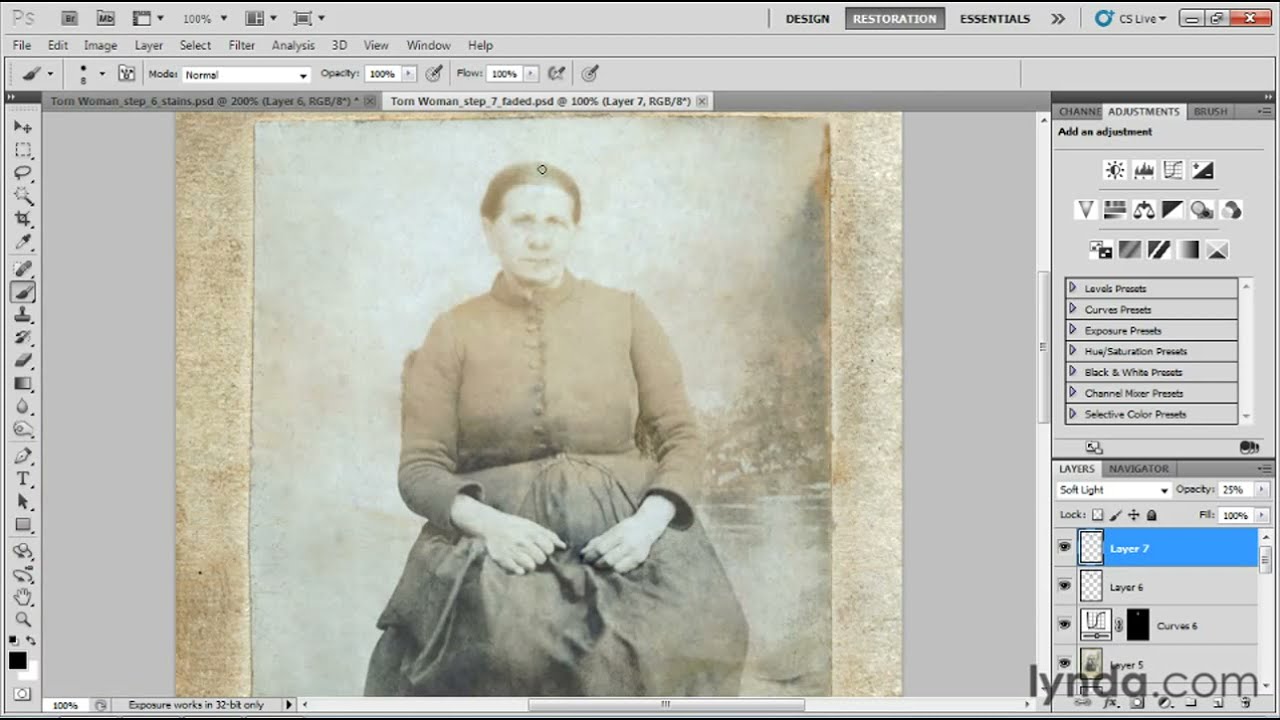
Auto adjustment does not mean that photo manipulators cannot adjust separate colors. For instance, if there is a need to enhance blue color, just click on Blue in the RGB menu, than create a special control point and make a curve out of it. You will see that by dragging the curve up or down you will make the chosen color lighter or darker. If you move the line to the left or to right, you we increase or on the contrary decrease the contrast.
You may also create additional line anytime you want, but do not forget about limits, as you may create not more than 14 of them. Still, as practice shows two or three lines are completely enough for repairing old photos in Photoshop. In case you want to the tones of vintage photography black or white, you should choose Grayscale.

3. Adjust brightness and contrast
If you are not satisfied with how the vintage photo has become enhanced after the second step, you still have a chance to make it brighter. It is possible to do without losing contrast, as for repairing old photos in Photoshop that is quite important. Surprisingly that brightness can be adjusted while dealing with Curves, but we will present you an easier way. Having several variants for achieving the same goal is the particular feature of contemporary Photoshop old photograph editing.

You will need to find the Adjustment panel, then choose Brightness, after it select Properties panel. In the last section you will find sliders and by moving which you will find the most appropriate brightness. It is important not to forget about saving a copy of improved photography with a new understandable name. This way you will not lose any done changes.

4. Crop edges
Usually old photos have disappointing problems as specks and marks on their surface. In case they are situated along photo edges, using Crop tool will be the most time-economizing and effective. To do cropping you will have to choose it from Tools panel and drag it to the right bottom and the top left corners to the area where you want to create a crop.
You still have a chance to change the future cropped area. In case you put a cursor outside the highlighted area you may rotate an image and if you put it inside, you may move a picture to the necessary direction. As soon as you are satisfied with the area, double-click will make final cropping.
5. Remove specks
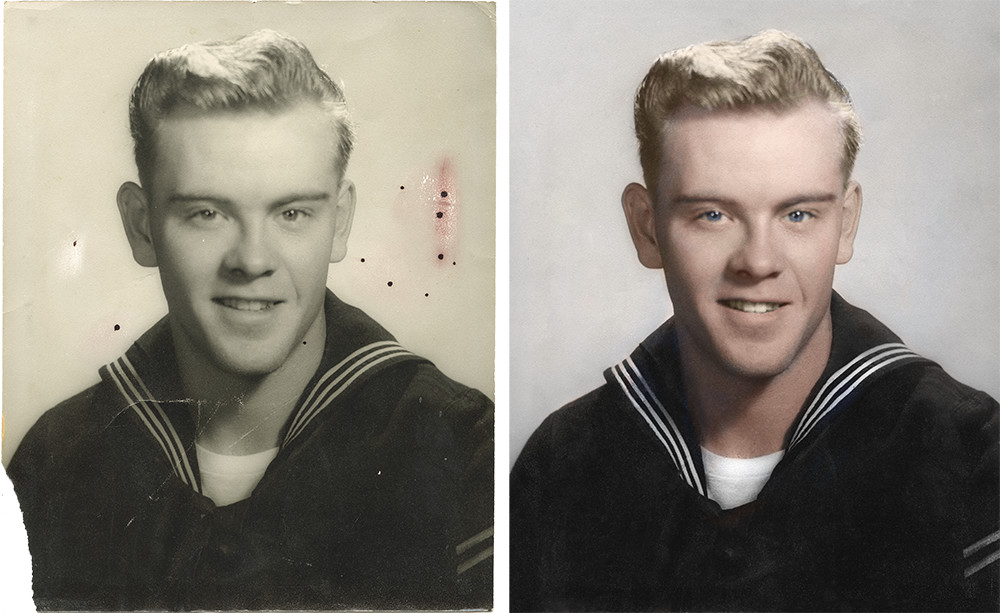
While repairing old photos in Photoshop, photo manipulators notice that specks are the most frequent troubles that every vintage photo has. The most disappointing is that this problem causes old pictures to look quite unattractive. Still, let`s consider this trouble from the other side. In case experts in Photoshop old photograph restoring manage to eliminate all of them, the difference between the starting and the final picture will be quite impressive and visible even for non-professionals. Masking troubles of this kind turns all photo restoration samples into quite alluring ones for viewers making them forget that such picture have years of history behind.

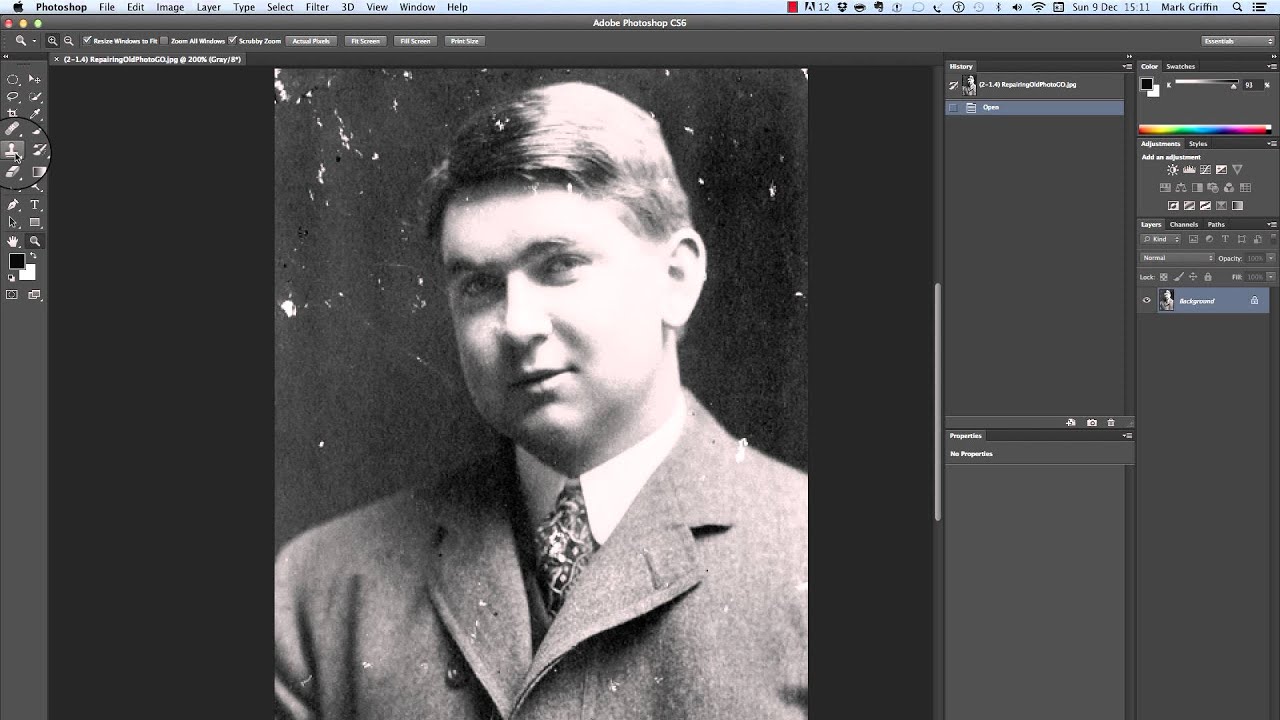
The first thing you should do to achieve the described result is to use Zoom tool. That will enable you to have a closer view and make all speckles more vivid. In case you want to zoom back to see the whole surface of a photo you are dealing with, press Alt or choose Option. It is necessary to have a strategy. For instance, you may start from the top left corner and move down and right. This way you will systematically work with the whole surface without leaving any empty untouched areas. From time to time you will have to zoom back to make sure that all speckles have been eliminated in the done photo parts. In general, remember that right organizing and planning are great bonuses for restoring old photos in Photoshop.

The most useful for covering this problem is Spot Healing brush. Its usage is quite simple. You just adjust the right size for it by pressing right or left brackets and after it cover the speck with the chosen tool. In case you do not like what you have done, click Undo Spot healing brush.
6. Repair background
Usually old photos have lots of folding marks on their backdrops. And depending on multi-year experience the most powerful tool for masking them is Clone Stamp. Before you apply this brush you will have to choose the suitable degree of rigidity (We advise to start from the lowest one and then gradually make it harder) and surely he size (That can be done in Brush panel). While working with it, below you will notice the Option bar that will allow you to toggle a brush panel. That is quite comfortable especially in sophisticated Photoshop old photograph editing.

This tool has one specialty. Before you apply it to the damaged area, you will have to find another photo area where pixels will be nearly of the tone, choose the closest possible tone). From your choice the degree of masking naturalness depends. In case pixels join together completely seamlessly, the result will be as if no Photoshop old photograph restoring has been used. For repairing old photos in Photoshop that is the highest level of professionalism. And the last piece of advice is that you should eliminate a folding mark on backdrop and face separately, unless you do not want your improved pictures to look artificial and ridiculous.

7. Repair face
To mask all folding marks from the face, you will have to combine using of the mentioned two tools. The organization of photographed face repairing will be the following. For great or deep damages you will take the Clone Stamp tool and where the deepness of folding marks is not so catastrophic, Spot Healing brush will be quite suitable. Do not use the first brush for masking everything as you risk getting completely artificial repaired photo.
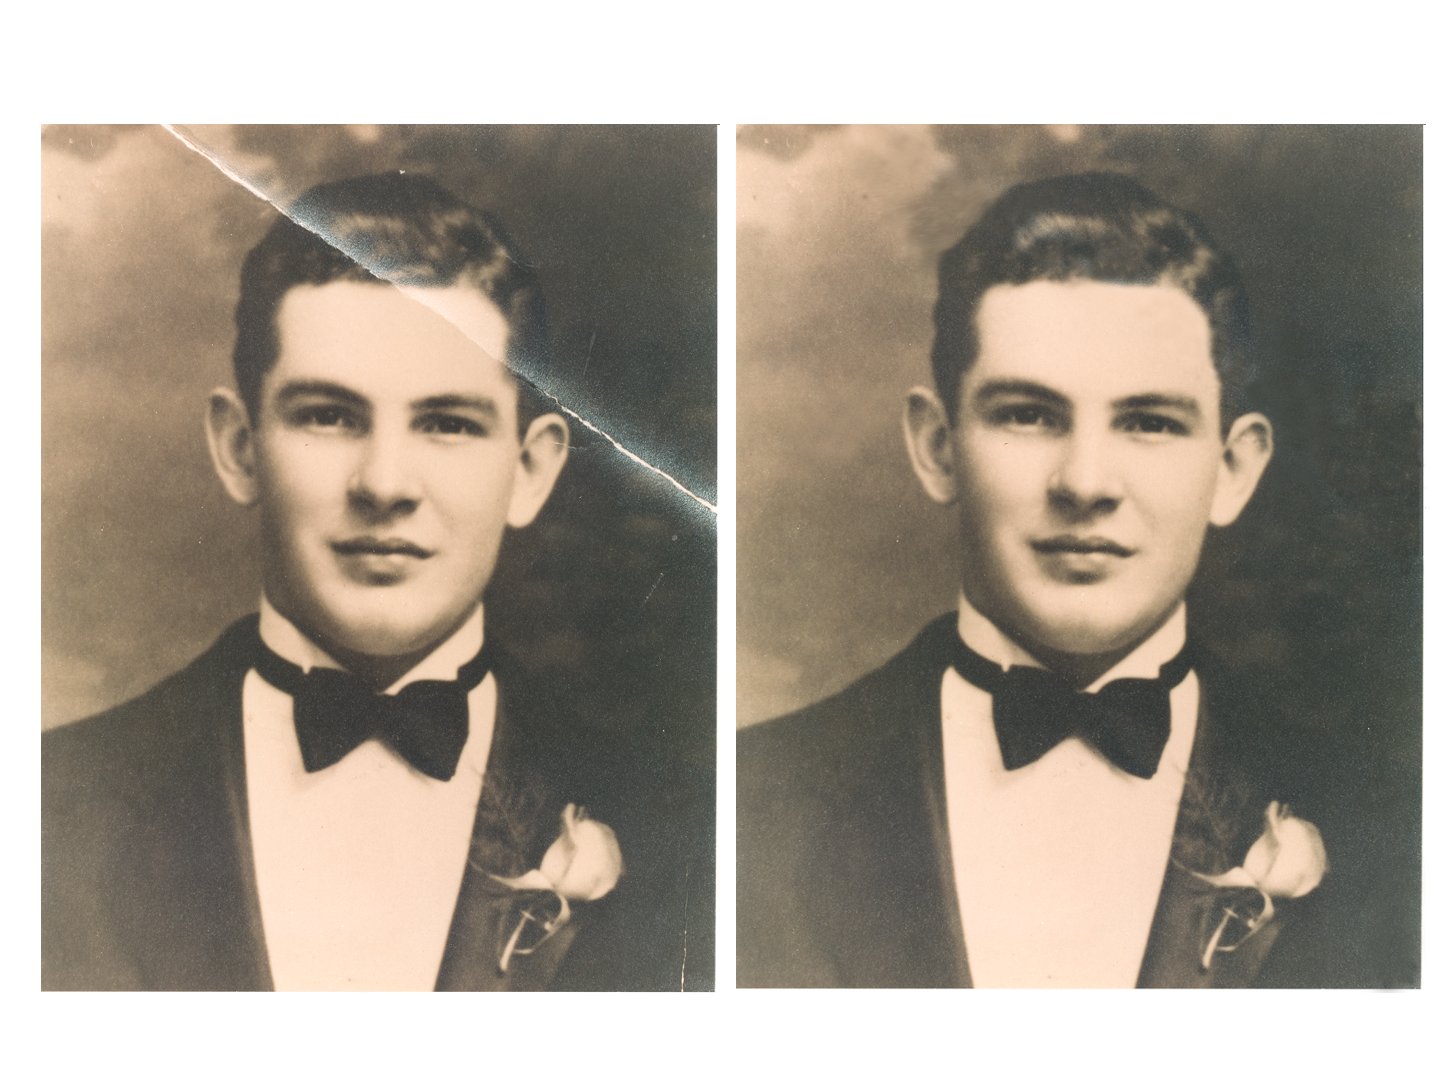
For dealing with large areas of damages, Patch tool will be the most effective. For this you will have to create a selection around the necessary area, then simply click in the center of it and drag the part that is similar in color of pixels. The most comfortable is that you may have a preview of done selection.

8. Draw What's Missing

Sooner or later while repairing old photos in Photoshop retouchers face a dilemma whether to draw the missing parts or just leave everything as it is. When it comes to complicated editing of this kind it is better to do not enough than to overdo.
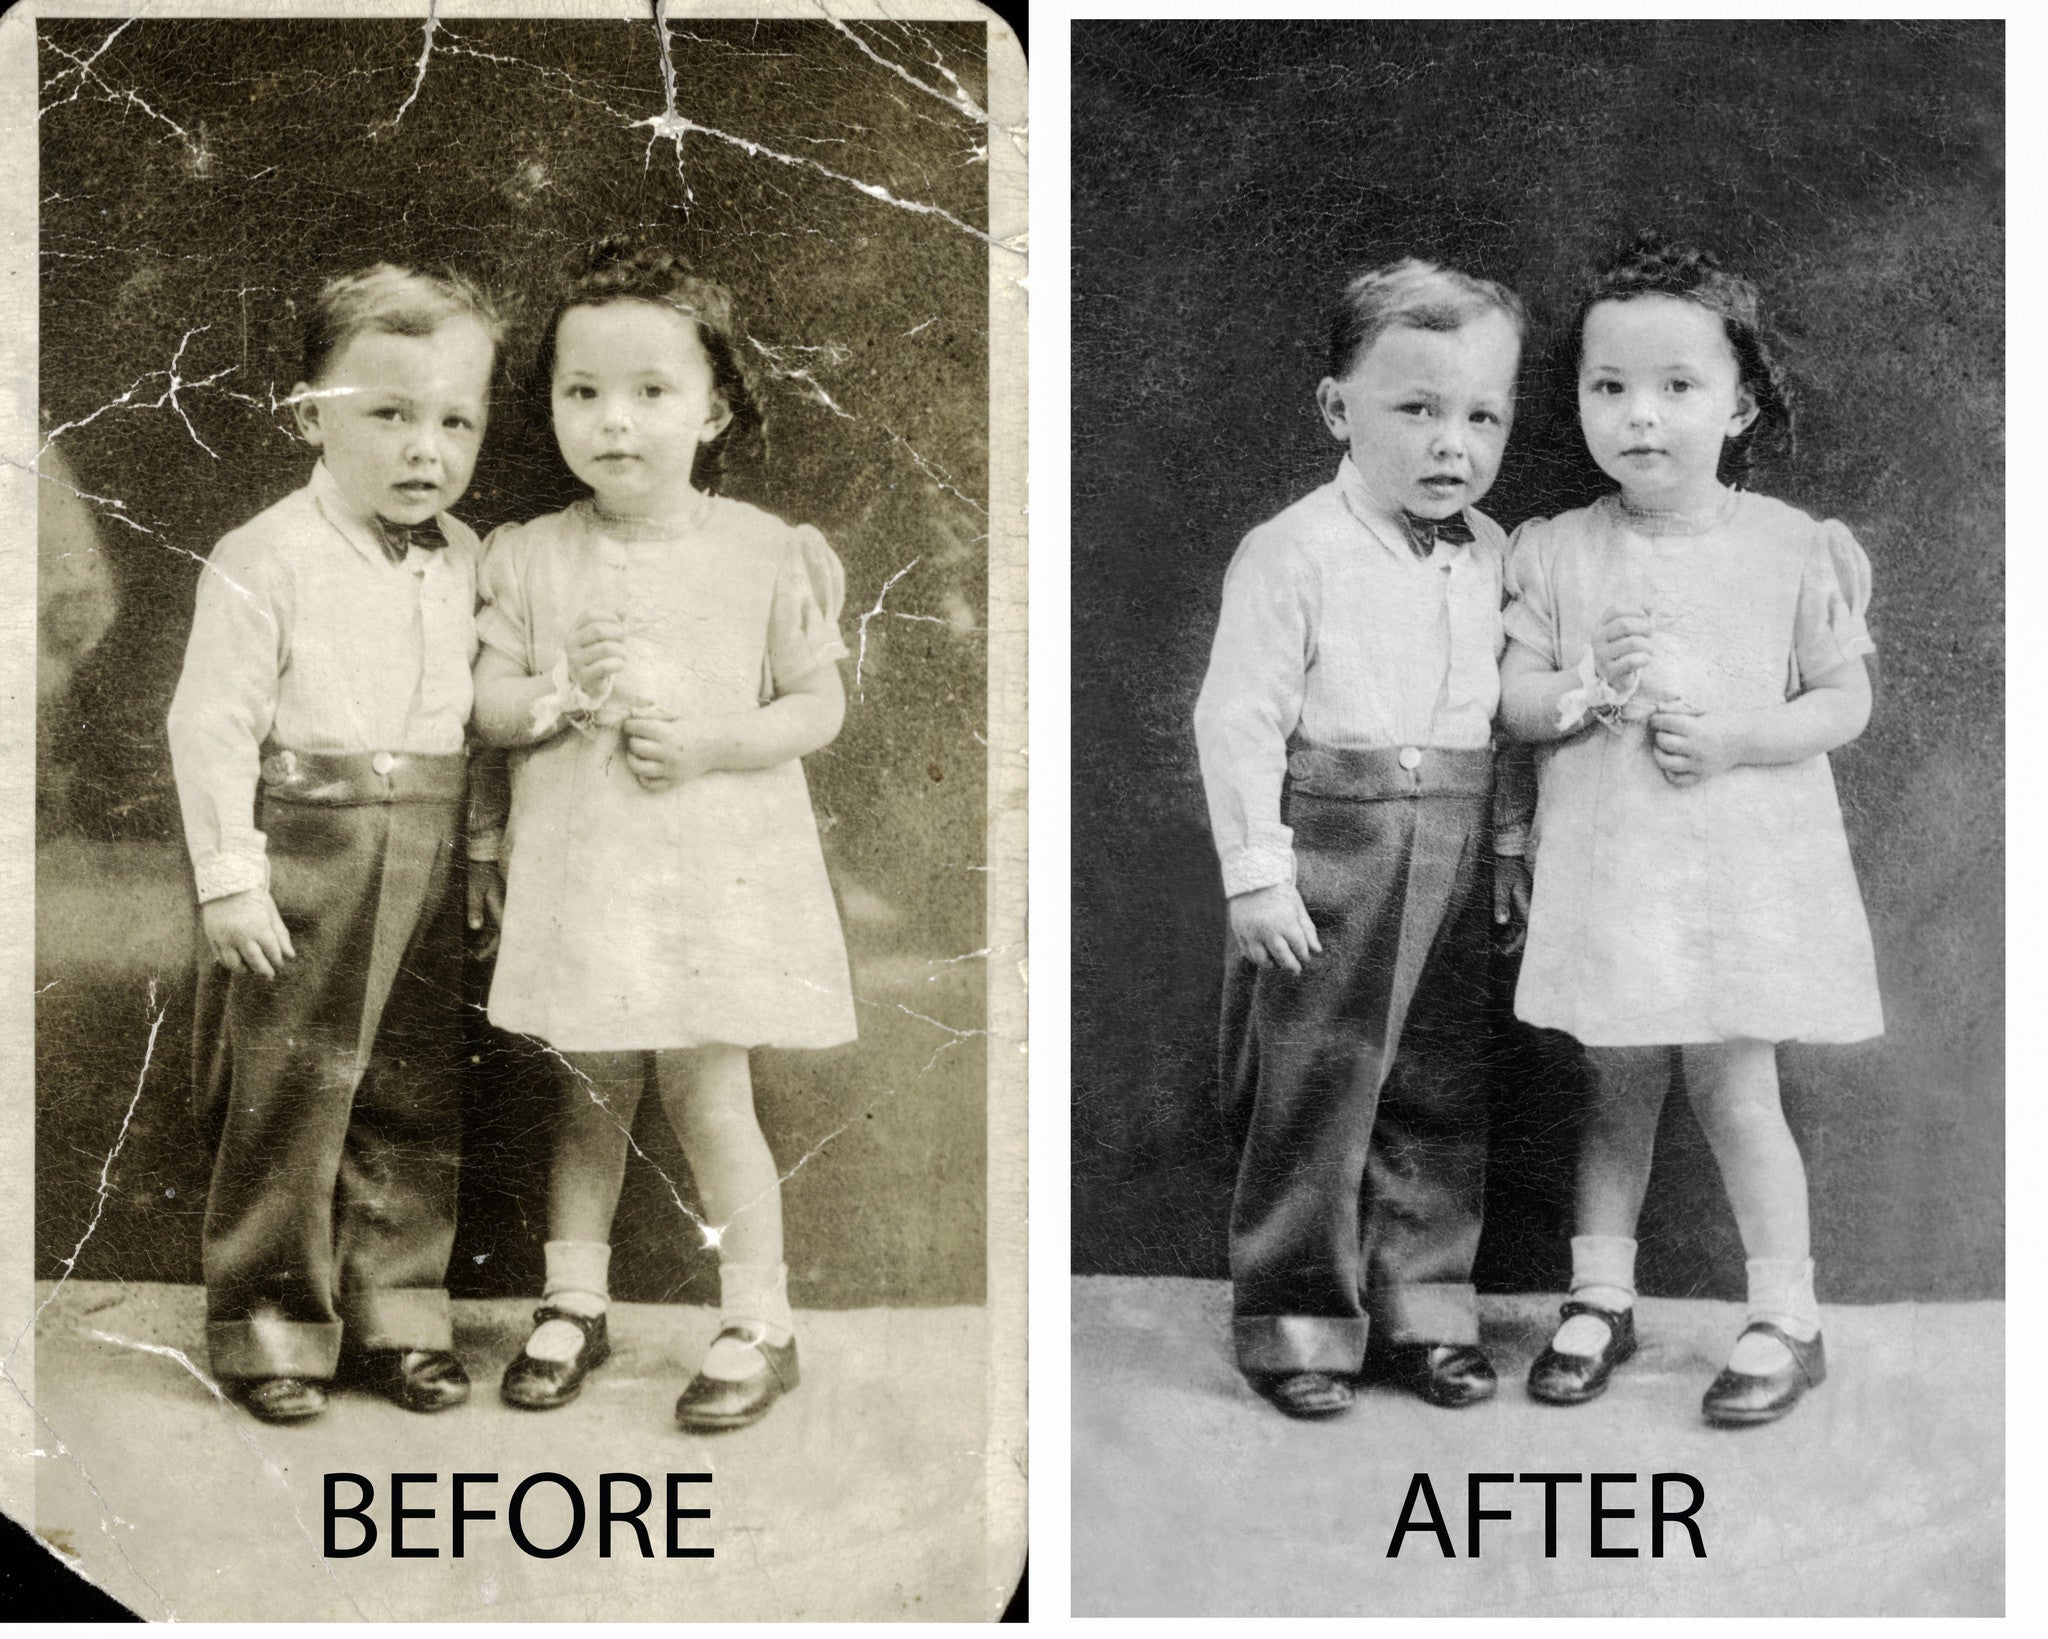
Why it is important to draw what is missing? The main reason is that while eliminating folding marks you might lose some quite important parts of the picture you work with. So, just pick up the Brush tool and create a new layer. We advise to set the minimal size of brush in order for your drawing manipulations to be less artificial. And do not make your lines too harsh, as the effect will be also disappointed. 2 px will be enough. Then, in case you need, you can make it bigger, but do not forget to adjust opacity.
9. Add highlights
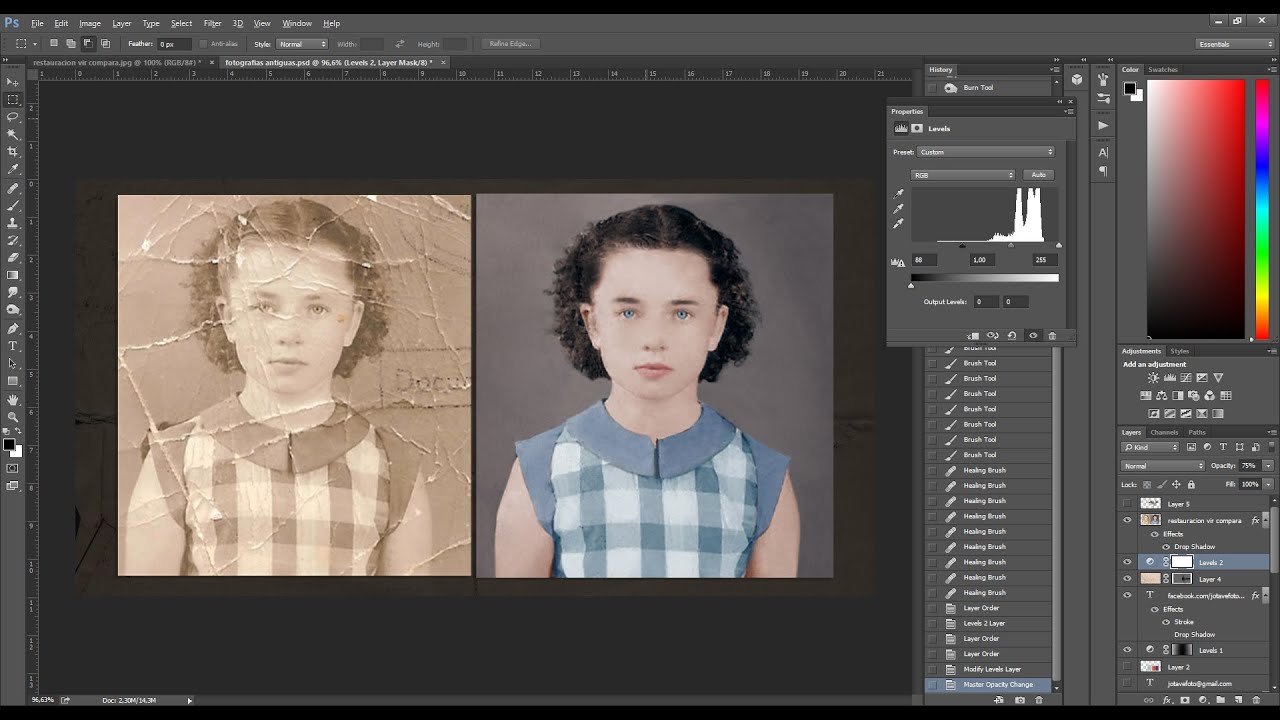
Often highlights, especially on photographed eyes are not so bright and visible as we want them to be or as modern pictures have. To solve the trouble, firstly you should mask the existing highlights, especially if they are not identical with clone Stamp tool. Then you just make them again with Brush tool.
We are used that highlights are commonly white, but while restoring old photos in Photoshop it is better to use off-white. The reason is that vintage pictures do not have so bright colors and tones as modern ones. Thus, white color will be in great contrast with other colors.
We do not demand from you to create a new layer any time you will make additions to vintage images. Still, as practice shows that might become quite useful in case you are eager to go back or do reediting. Besides, this technique is also useful in modern retouching for professional use, private purposes and even social nets. To make sure in this and many other editing tendencies, read Instagram photo editing strategies for photographers and digital artists.
10. Repair discoloration

In case your picture has visible discoloration, Photoshop old photograph repairing will be also effective in case you use it efficiently. The best solution will be to replace pixels with wrong colors by applying Patch or Clone Stamp tool.

If you want to make sure that everything is right and you have not missed any pixels, just zoom in a photo. If needed you may make further repairing. The whole procedure is quite simple and not troublesome. But it requires patience and time. The same can be said about photo restoration in general. This sphere is undeniably useful and effective, but sophisticated. Not every editor can do picture restoring himself/herself. For this, we offer our qualified services with modest photo restoration prices, communicative specialists and unique attitude to every order. We are experts that know how to help you.
Tell you friends about this article!

Would you rate the article?
The article has a rating of:
|
| Via Facebook: |
| Via Disqus: |